Tuesday, December 20, 2011

Lobster Cakes

Many of you are asking for the Lobster Cake recipe that I made for the Christmas Tea Party.  I made a few changes to make these smaller than the original recipe stated by using a mini muffin pan instead of a mini cheesecake pan. Use either pan, they are wonderful both ways!


Lobster Cheesecakes
Source: Tea Time Magazine ~ November/December 2011
Prep: 30 minutes   Cook: 5 minutes   Bake: 24 minutes   Oven: 350 degrees F
Yield: 2 dozen mini cheesecakes (or 40 mini muffin size cakes)

2     cups finely crumbled round buttery crackers
1     cup finely grated Parmesan cheese
6     tablespoons butter, melted
1     large egg white
2     tablespoons butter
1/2  cup finely chopped red bell pepper
1/4  cup finely chopped green onion
3    (6 oz.) lobster tails, cooked, meat removed and finely chopped
2     tablespoons chopped fresh dill
1/2  teaspoon salt
1/4  teaspoon ground black pepper
2     (8 oz.) packages cream cheese, softened
2     large egg yolks
Garnish: fresh dill

Preheat oven to 350 degrees F. In a medium bowl, combine cracker crumbs, Parmesan cheese, melted butter, and egg white, stirring to mix well. Press into bottom and halfway up sides of wells of 2 (12-well) mini cheesecake pans. Bake for 6 minutes.

In a medium skillet, heat butter over medium heat until melted. Add bell pepper and green onion. Cook for 3 minutes, stirring frequently. Add lobster, dill, salt and pepper. Cook for 2 minutes, stirring frequently. Remove from heat, and set aside to cool for 5 minutes.

In a medium bowl combine cream cheese and egg yolks. Beat at medium speed with an electric mixer until creamy. Add lobster mixture to cream cheese mixture, stirring to combine. Divide mixture evenly among baked crusts.

Bake until set, 16-18 minutes. Cool slightly before removing from pans. Garnish with fresh dill, if desired.


Wednesday, December 14, 2011

Christmas Tea Party ~ Christmas Cheeseball


The most rewarding part of cooking and baking for me is sharing food with others. I love the looks of anticipation, raised eyebrows, savor of a first bite and smile as my friends and family try some new or repeat recipe out of the Melt kitchen. The past few weeks I had the opportunity to cater a Christmas Tea hosted by my mother for her church friends...in total about 60 ladies over two different weekends.


My perspective from the kitchen allowed me to visit with just about everyone, but simultaneously watch beautiful expressions of shared friendship, warm embraces and holiday joy on familiar dear faces. More than once, my eyes filled with tears and heart overflowed with the beauty of friends gathering and enjoying shared time together.

Lobster Cakes

I am sharing the menu, a few photo's of the food and a quick Christmas cheese ball recipe. The cheese ball recipe is one my mom has made for years...I just added some diced pimentos, water chestnuts and changed the nut from almonds to walnuts.


Christmas Tea Party Menu
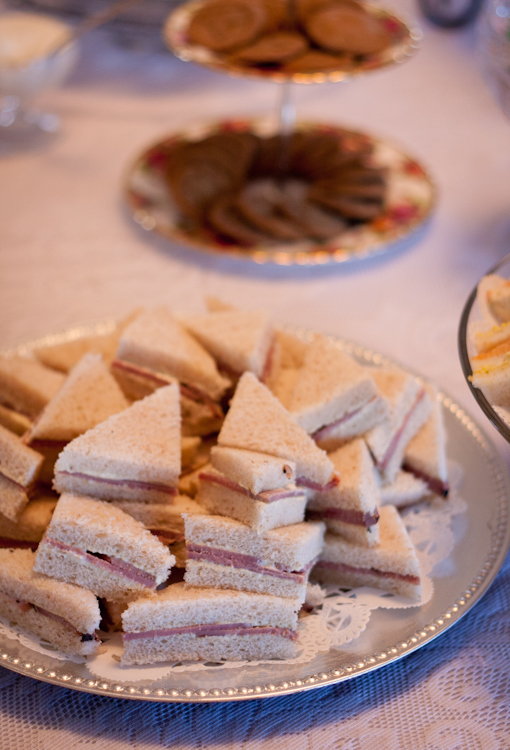
3 Layer Sandwiches (Egg Salad, Ham Pate and Vegetable Cream Cheese)
Cucumber Christmas Tree Sandwiches
Chicken Salad Puffs
Lobster Cakes
Christmas Cheeseballs and Assorted Crackers
Stuffed Tomatoes
Carrots and Celery with Ranch
Gingerbread Scones with Spiced Cream
Pistachio Cranberry Scones with Orange Cream

Fruitcake Tea Bread
Pineapple Carrot Cake
Spritz Cookies
Millionaire Shortbread
Red Velvet Cake Pops
Peppermint Bark

Orange Spice Tea
Vanilla Tea
Tea-based Christmas Wassail


Christmas Cheeseball 
Source: adapted from my Mom

1    pkg Hidden Valley Ranch Dressing Dry Powder (milk recipe)
1/2 cup mayonnaise
1/2 cup milk
8    ounces cream cheese, softened
8    ounces shredded sharp cheddar cheese
4    ounces diced pimentos
8    ounces sliced water chestnuts, drained and chopped finely
5    ounces walnuts, toasted and finely chopped

Mix dressing, mayonnaise, milk and cream cheese until well blended. Add cheddar cheese, pimentos and water chestnuts. Cover and freeze for 30 minutes. Shape into a ball and roll in the toasted walnuts. Refrigerate until ready to serve.

Harmony's Thoughts
I rolled these into individual cheese balls using the same method. 

Red Velvet Cake Pops


Thursday, December 1, 2011

Pumpkin Cheese Bread

Today was a beautiful winter day here in central Pennsylvania. Cold and crisp with lots of sunshine. I trudged the hills with my dog Max and my sisters dog Bailey. It was a welcome break from baking and prepping ingredients the rest of the day (I am catering a Christmas tea this weekend for about 40 ladies). 

As I explored and refreshed my mind with a walk, I was struck by how busy our lifestyles are this time of year. I know it is important to send Christmas cards, buy gifts, bake those Christmas cookies and entertain friends, but often we miss out on the enjoyment of these things because we scurry to the next task on our list. In the midst of "making your list and checking it twice," take one step back to soak in the moment and cherish those around you.

Now that I shared my thoughts, I want to share an amazing recipe from a new cookbook I recently purchased. This pumpkin cheese bread intrigued me as soon as I turned to its page. I knew it was either going to be terrible or terrific, and I took a risk, mixed up a batch and served it along side the soup and salad course for Thanksgiving dinner. The "big" risk equaled big reward! It was the highlight of our meal! 


If you have a can of pumpkin and some sharp cheddar cheese in your kitchen...go make this! If you don't have the ingredients, pull on your old sweats and go get them.......now that your back.....make this bread! Get the point?? Make this bread!!! :) The dough does have to be refrigerated overnight, but the recipe is incredibly simple. I ate this warm out of the oven, toasted for breakfast and (shhhh...) as a grilled cheese sandwich. 


Pumpkin Cheese Bread
Source: The Beekman 1802 Heirloom Cookbook by Brent Ridge and Josh Kilmer-Purcell
Prep: 15 minutes    Let Stand: Overnight    Rise: 1 hour   Bake: 50 minutes   Oven: 375 degrees F

3 1/2   cups all-purpose flour, spooned and leveled
1         tablespoon light brown sugar
2 1/4   teaspoons rapid rise yeast (1 envelope)
1 1/4   teaspoons salt
1/8      teaspoon cayenne pepper
3/4      cup canned unsweetened pumpkin puree (not pumpkin pie mix)
1         cup shredded medium or sharp cheddar cheese
1         tablespoon unsalted butter, softened
1         large egg yolk, lightly beaten with 1 teaspoon water

In a large bowl, stir together flour, brown sugar, yeast, salt and cayenne. Add 1 cup water, the pumpkin and cheese and mix until well combined. The dough will be slightly sticky.

Turn the dough out onto a lightly floured surface and knead until it forms a smooth ball. (Add flour as needed) Sprinkle a large bowl with flour and add the ball of dough, turning to coat. Cover with plastic wrap and refrigerate overnight.

The next day take the dough out of the refrigerator, transfer to a lightly floured work surface and flatten the dough to a rough rectangle with your hands. Use the butter to coat a 9x5-inch loaf pan. Roll the dough up into a cylindrical shape and place seam-side down in the loaf pan. Cover loosely with plastic wrap or a clean towel and let rise at room temperature for 1 to 1 1/4 hours, or until almost doubled in volume.

Meanwhile, when the dough has risen for 35 minutes, preheat the oven to 375 degrees F.

Slash the loaf down the center with a sharp knife. Brush the loaf with the egg-water wash. Bake for 50 minutes, or until the bottom of the loaf sounds hollow when tapped. Turn the bread out of the pan and onto a rack. Serve warm or at room temperature.

Harmony's Thoughts
I used about 1 1/2 cups of extra sharp cheddar cheese.
I did not bother with the egg wash and just used regular yeast, not rapid rise.


Sunday, November 20, 2011

Apple Dumplings

We all struggle with showing our true selves to each other. I believe it is a very human trait to attempt to project an image of ourselves that we want others to believe is who we are. And although sometimes the censorship is appreciated, I believe that we typically take ourselves too seriously. Working towards complete honesty while continuing to protect my privacy on this blog is a delicate balance. I do not feel the need to share each detail of my life, or even everything that I eat and cook. Where I strive to be very honest is in the passion I have for cooking and the person I am when I step into my kitchen (or any kitchen). My desire is to be helpful, to inspire and learn while sharing with you. 


So I have a confession to make :) Saturday I made home made puff pastry. At the risk of my readers not being interested in making their own puff pastry and considering me to be a food snob, I quickly decided that I would not share my experience through the process and began making apple dumplings to feature on the blog instead. But as I considered my decision I came to the realization above. I was making a choice to hide my first experiment with puff pastry when I had such an excitement and passion to explore a laminated dough. It might make me a bit of a food snob to want to make my own, but that is who I am. 

Currently I do not have the photos of the process and am not sure if I will share the recipe, but I at least wanted to share my excitement as I tackled the huge undertaking of creating a laminated dough like puff pastry and the pride I felt when the whole project (that took all day to complete) was finished successfully!

Although the apple dumplings made for dessert are much more homey and basic then a puff pastry, they were a huge hit with my family and me. Taking inspiration from a baked apple, I chose to fill the cores of the apples with a mixture of currants, walnuts and spices. Hopefully you will take the time to try this delicious recipe and be reminded to open yourself up and be honest with others when sharing who you are.


Apple Dumplings
Source: Better Homes and Gardens Cookbook (published 1976)
Prep: 20 minutes   Bake: 40 minutes   Oven: 375 degrees F   Servings: Makes 6

2       cups water
1 1/2 cups sugar
1/4    teaspoon ground cinnamon
1/4    teaspoon ground nutmeg
8       drops red food coloring
1/4    cup butter
2       cups flour
2       teaspoons baking powder
1       teaspoon salt
3/4    cup shortening
1/2    cup milk
6       small, whole apples pared and cored

For syrup, mix first 5 ingredients; cook 5 minutes. Remove from heat; add butter.

Sift together dry ingredients; cut in shortening till mixture resembles coarse crumbs. Add milk all at once; stir just till flour is moistened. On lightly floured surface, roll to 18x12-inch rectangle.

Cut in six 6-inch squares. Place apple on each. Sprinkle apples generously with additional sugar, cinnamon and nutmeg; dot with additional butter. Moisten edges of pastry. Bring corners to center and pinch edges together. Place 1 inch apart on an ungreased 13x9x2 inch baking pan. Pour syrup over dumplings. Bake at 375 degrees for 35 to 40 minutes. Serve warm with cream or ice cream.

Harmony's Thoughts
I omitted the red food coloring.
I filled the cores of the apples with a mixture of 1/3 cup currants (you could use chopped raisins as well), 1/3 cup walnuts, 1/2 teaspoon rum flavoring, 2 tablespoons brown sugar and 1/4 teaspoon cinnamon. Divide evenly among the 6 apple cores.
The recipe was vague on how much additional sugar, so I measured about 2 1/2 teaspoons of sugar and a sprinkle of cinnamon and nutmeg for each apple. Along with 1 small dot of butter. 

Wednesday, November 9, 2011

Sour Cream Pumpkin Tart

The past two Thanksgivings my husband and I have shared together have been without family. We split every other Christmas with my parents or his, but Thanksgiving has been spent with a group of military guys that are without family as well. Each Thanksgiving and Christmas dinner I plan includes this Sour Cream Pumpkin Tart. This year, since my husband is in training and I'm with family in Pennsylvania, I am hoping that I can convince my family that they want this on menu!

As you are menu planning for Thanksgiving, consider this Sour Cream Pumpkin Tart (or pie). It is simple but spectacular topped with a dollop of maple whipped cream.


Sour Cream Pumpkin Tart (or Pie)
Source: adapted from Baking: From my Home to Yours by Dorie Greenspan
Prep: 15 minutes   Oven: 400 degrees F then reduce to 300 degrees F

1    9 inch pie shell or 11 inch tart shell, partially baked
2    cups pumpkin puree
3    eggs, room temperature 
1    cup light brown sugar
1    cup heavy cream
1/2 cup sour cream
1    teaspoon cinnamon
1    teaspoon ginger
1    pinch of ground cloves
1    pinch of nutmeg
1    pinch of salt
3    tablespoons dark rum (optional)
2    teaspoons vanilla

Preheat oven to 400 degrees F. Whisk all ingredients for 2 minutes. Pour into crust. Bake at 400 degrees F for 10 minutes, then reduce the temperature to 300 degrees F and continue to bake for 35 to 40 minutes (20 to 25 minutes for a tart) or until set.

Cool to room temperature and serve with whipped cream.

Harmony's Thoughts
To make Maple Whipped Cream, add 3-4 tablespoons pure maple syrup after beating your 1 cup of cream stiff. Sweeten to taste with more maple syrup. Another option is to use maple flavoring instead of vanilla in your whipping cream. Sweeten with powdered sugar in this case.
Although I have scaled this recipe down some, I still end up with a little extra filling. I typically pour the extra filling into greased ramekins and bake with the tart.

Saturday, November 5, 2011

Tea Party Menu Planning


My Grandma asked me a few weeks ago to cater an afternoon tea for her while I was visiting in Wyoming. The tea was this past week and I wanted to share the menu that I created and a few snapshots as well. I will work to post many of the recipes over the next few weeks.


Afternoon Tea Menu
Open Faced Cucumber Sandwich
Curried Chicken Salad on a Puff Pastry
Egg Salad, Ham Pate and Vegetable Cream Cheese Sandwich
Roast Beef with Spicy Mustard Sandwich

Herbed Goat Cheese Stuffed Cherry Tomatoes
Carrot Sticks and Celery with Ranch

Vanilla Bean Scones
Lemon Poppy Seed Scones      (all with clotted cream, lemon curd and strawberry preserves)
Blueberry Almond Scones

Raspberry Mousse Tarts
Apricot Thumbprint Cookies
Mini Gingersnap Cookies
Chocolate Truffles


Egg Salad, Ham Pate and Vegetable Cream Cheese Sandwiches


Scones with Clotted Cream, Lemon Curd and Strawberry Preserves


Carrot Sticks and Celery with Ranch


Curried Chicken Salad on Puff Pastry


Open Faced Cucumber Sandwiches


Roast Beef with Spicy Mustard Sandwich


Herbed Goat Cheese Stuffed Cherry Tomatoes


Mini Gingersnaps and Apricot Thumbprints


Tuesday, November 1, 2011

Eggs Benedict

Just an update on our move and new adventures...my husband is currently in GA in training and will remain there until the middle-end of March. I am in Wyoming this week at my grandparents ranch. The Melt kitchen is mobile and catering my grandmother's tea party at the end of this week. The menu is planned and the prep work is beginning. I will do my best to document the process to share some recipes and ideas with you! In the meantime, here is a favorite breakfast (although, I admit I have eaten it for lunch and dinner) loved by so many and extremely versatile.

Eggs Benedict is such a classic breakfast that I'm not sure if it really needs much of a recipe. At the same time, I make my Hollandaise sauce from scratch and wanted to share the recipe and hopefully inspire you to play with it as well.
 

Hollandaise Sauce
Source: original recipe

3    egg yolks
1    teaspoon lemon juice
1/2 cup butter, cold
Pinch of cayenne
Pinch of ground nutmeg
Pinch of salt

In a small saucepan, whisk egg yolks with lemon juice. Over the lowest heat setting possible, add butter in one whole piece and stir constantly until it begins to slowly melt. Continue stirring until butter completely incorporates into egg yolks without curdling the egg. The sauce will thicken gently. Remove from heat and add cayenne, nutmeg and salt. Set a small bowl over a larger bowl of very warm water; pour the sauce into the small bowl, cover and keep warm.

Eggs Benedict 

4    English muffins, split, toasted and buttered
8    slices of Canadian bacon, warmed
8    eggs, poached
1    recipe of Hollandaise sauce

Assemble by placing the English muffin on the plate, topped with a slice of Canadian bacon, and an egg. Pour a generous amount of Hollandaise sauce over the egg, garnish with chives or a sprig of parsley and serve.

Harmony's Thoughts
If you don't like "runny" eggs, cook them a bit longer (than the average 2 1/2 minutes) to firm the yolk up. This was my trick for easing my husband into any kind of a "dip egg". I got him hooked on Eggs Benedict and then slowly brought the eggs from firm to runny a little bit each time I made it....It worked!
The variation on this recipe is endless. I have seen savory scones and biscuits replace the English muffin, crab and salmon cakes replace the Canadian bacon, cheese added to the Hollandaise sauce and so on. Honestly........feel free to play with it and let something unusual inspire you. If you do, share with us in the comment section below this post!